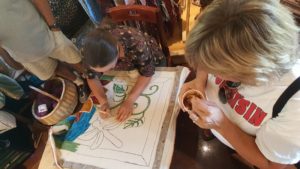
 I enjoy teaching fiber arts. There’s that magical moment when things click for the student, and that spark of joy as the project comes together. As I move towards teaching in the medium of punch needle rug hooking, I wondered for a while what would make a good project for a multi-day intensive class. Personally, I’ve never been a fan of “sampler” projects–I always wanted to get right into making something appreciable as a finished work that was also a good learning tool.
Some instructors start students in punch needle rug hooking using an embroidery hoop as the frame. But it’s hard to keep good tension on an embroidery hoop, which equals frustration and a less-than-desirable outcome. I like for students to work with full-scale materials and equipment. If you’re wondering whether it’s something you would like, come catch a demonstration! If you’re ready to dive in and be a student of the medium, let’s get started.
So, back to planning a project that would be approachable yet interesting for students. My starter frame (the Oxford gripper strip 18×18) works great for projects that are 14×14 inches (they stretch out to 15×15), which works out well as a pillow cover. Why not! Not only would students learn how to use a frame and punch with the tool but also how to finish the edges and attach it to an object (the pillow) in a way that transformed the project into a useful and aesthetic piece. That’s precisely what fiber arts are so good at doing!
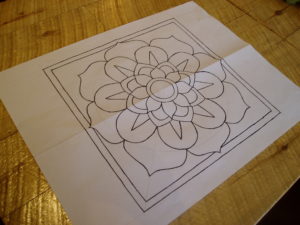 When conceptualizing the design, I wanted to include straight lines, curved lines, points, and angles of different degrees. Perusing my stash of adult coloring books (which are a great place for gleaning design ideas), I decided on a floral mandala as a great means for including all of these elements. Now it was time to draft a design.
If you’re one of those who cries “But I can’t draw a circle!,” fear not, for here’s a design hack. Go to the kitchen. There’s perfect circles everywhere. Here, I started by building out from the center, first outlining the border of the design. Then I drew the design into quarters (like a window) and on the diagonals with the help of a yard stick. Using this basic grid, I then started in on my circle guidelines–conscripting glasses, bowls, plates, and platters for the purpose. Measuring from the outside of the plate or bowl to the established border, I could fully determine if the circle was centered.
 From these layered grid markings, I then hand-drafted the petal shapes, laying a sunflower, forget-me-not, zinnia, and lotus style petals over each other. With my pattern complete, I inked the “official” lines and was ready to transfer the image onto the monk’s cloth backing. My favorite method for this purpose is to clear off the bakery case at Farmstead Creamery, layer the cloth over the paper, and have at the transferring.
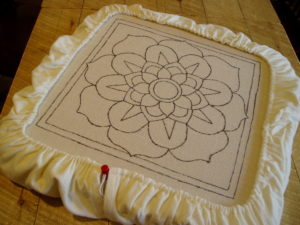
Here the design is on the backing, which has been stretched over the 18×18 frame. The gripper strip barbed rim is protectively covered with the flannel rim to keep wrists and arms safe. Now the piece was ready for punching. But oh, the color choices! While the design requires a minimum of four colors for full differentiation, I ultimately chose six, playing with the idea of the layered flowers on top of water lily/lotus leaves floating on the water. While I would have colored it more intensely and with greater detail if I was just making this for my own interest, I wanted to work the colors in a way that would be attainable and approachable for students. Therefore, using variegated yarns in the selection added interest and shading that otherwise would have required manually changing colors and making lots more choices along the way.
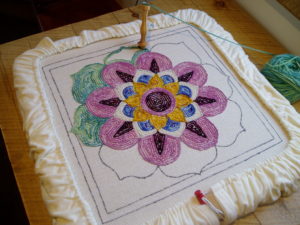 My colors selected, it was now time to start punching. Nicely, this design is worked from the center outwards. The border is worked next and finally the background. In this picture, showing the side you punch from (which ends up being the back), you can see the direction of the stitches as the punch is worked across the surface. For most of these shapes, I outlined the edge and then filled them in to the center.
For this project, I’m using the Oxford Mini punch needle. This gauge uses worsted weight yarns and leaves a 1/4 inch loop, which works great for a pillow top. The smaller gauge also allows for more design detail than in my first piece, which was worked with rug weight yarn and a much larger punch needle. The mini glides through the monk’s cloth backing much easier than a rug punch needle (because of the smaller shaft diameter) and there’s much less guesswork with the stitch spacing–every hole in the direction of travel, and skip a hole between the rows of travel. (It makes more sense when you’re working it than a description, so don’t worry if that sounded confusing.)
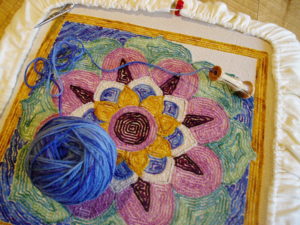 Almost finished! Now the full color scheme is appearing, with the last corner of watery background to go. Along the way, I’ve been weighting the balls of yarn before working a color section and then weighing them again after working that piece of the pattern–making notes about how much each element of the design used. This will help me estimate the amount of yarn each student would need in order to complete this project successfully. It’s certainly no fun to work on a project and run out of a color part-way! I did that on my first one…had to wait a couple of weeks to get the rest of the blue…oh, waiting is hard when you’re fully engrossed in a project!
More updates on developing this student project to come! If you would like to learn how to make this, send me a message on the contact page.
